Fun, Refreshing, and Healthy
Fun, Refreshing, Healthy with a touch of bacon on top. Yup, that is the food blog ‘How Sweet It Is’ that Jessica Merchant created. Jessica is a former personal trainer who writes about food, fitness and living a healthy, balanced life at How Sweet It is. She believes in loving what you do and doing what you love, and enjoys bacon and the treadmill equally.
I enjoy Jessica’s blog as she seems so sweet, and based on her storytelling, lots of fun. In fact, I have imagined her as the super fun but grown-up babysitter. The kids would love her to babysit, I am sure of it. I bet if she was babysitting they would eat BLT’s and giggle the whole time. I also wish Jessica was my neighbor as I know we would go for walks while sipping coffee or tea and then take turns making messes in each others kitchens while we created all kinds of tasty nibbles.
Okay, so anyhow, I was doing the daily check-in at her blog and saw that she made some 5 Ingredient Peanut Butter Granola Bars. I wrote her and begged her to let me feature them here and her Chicken Macaroni & Cheese on Babble and if she did, I would send her bacon. Luckily, she said go for it but keep the bacon.

How Do You Get Granola Bars To Stick Together?
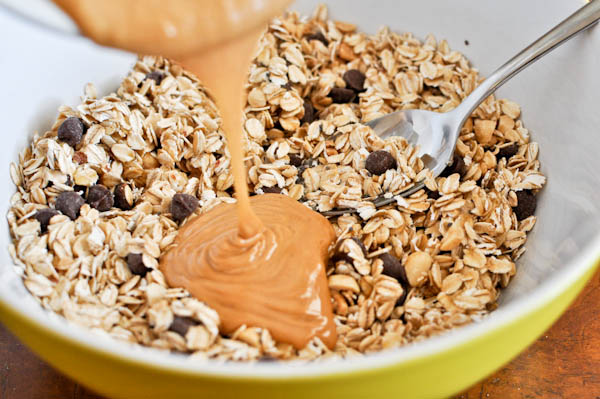
So many wonder and worry ‘How do you get granola bars to stick together?’. Well, no fear my friends in this recipe, we use brown rice syrup to help these yummy bars stick together. Plus, the peanut butter itself, as we have all experienced if it has gotten stuck in your hair, is quite sticky.
4 cups rolled oats
2 tablespoons chia seeds (these are optional, I just love the texture they give)
1/2 cup unsalted peanuts, chopped
3/4 cup natural peanut butter, melted
1/2 cup brown rice syrup (honey works too!)
add ins include chocolate chips, wheat germ, flaxseed, dried fruit (I made some with cherries!), other nuts, seeds, coconut
Directions:
1. Preheat oven to 350.
2. In a large bowl, combine oats, chia seeds and peanuts. Add brown rice syrup (or honey) and mix to combine. Add melted peanut butter and mix until moistened. This works as a perfect, simple granola bar, but you can also throw in any add-ins at this time. Fold them into the dough. You may need to get in there with your hands and work the granola dough! If dough is still too dry (this can depend on your ingredients) add more peanut butter or syrup (or honey) 1 tablespoon at a time until moistened.
3. Press dough in a greased (non-stick spray) 9 x 13 baking dish. Bake for 25 minutes.
4. These would also work as a great no-bake granola bar, but I liked how they came together and the chocolate chips melted as they got warm. If you want to make no-bakes, simply press the dough into the pan and refrigerate for 60 minutes.
More Peanut Butter Loving Recipes:
HOMEMADE PEANUT BUTTER CHOCOLATE CUPS
CRISPY RICE PEANUT BUTTER TREATS WITH WHITE CHOCOLATE DRIZZLE RECIPE
PEANUT BUTTER & BANANA OATMEAL BREAKFAST RECIPE
Krystle says
Love this! So easy and simple! Loved making it with my 3 year old daughter who chose to use golden raisins and choc chips as add-ins!
Veronica says
After making a 15-ingredient recipe for many years, I was very happy to find this one. I increased the amount of honey AND peanut butter to help with the binding. Also, I used a cupcake pan and wrappers and this also helped with the crumblyness as you dont need to cut them. They are delicious and the combinations with the add ins are endless. Thank you for this recipe!
Jennifer says
Possibly agave nectar or honey.
Jen says
Any suggestions for substitutions for the sugar?? I can’t have any sugar at all. I don’t care about the sweetness just as long as the recipe works. Thanks!
Heidi says
I’ve been making these and have done many variations, but my best tip is to put these in muffin tins with the papers. Be sure to push rhe mixture down well before baking, it will help to keep them together.
Janet says
Just finished baking theses. A bit disappointed, they keep falling apart. Makes a great tasting granola, but a poor “bar.”
Penelope says
Just made these! I added a 2 tbs of coconut oil, used 1 cup of peanut butter, and honey. They were a little bit crumbly, even after cooling in the fridge. So, I melted dark chocolate chips and spread it over the top of the pan. Let that cool for another hour and now they’re perfect 🙂 Thanks for the recipe!!!
Leighann says
My husband loves granola bars but I hate all the additives so I’m making these today with natural PB (just blende peanuts), organic local honey, carob chips, peanuts, oats, chia seeds, a ripe mashed banana & coconut flakes … I can’t wait to try them!!
Jennifer says
Sure – it may not be quite a thick but could work
theresa says
can you use agave nectar instead of brown rice syrup?
connie says
trick to keep bars together. first, they need to be cold. if melting the peanut butter (not necessary, works either way) then longer than 1 hr in the fridge. best trick is I melt some dark chocolate (it has antioxidants) and spread on top after bars are cooled and cut up. let cool back in the fridge. u can use butterscotch or peanut butter chips or even just milk chocolate or white chocolate. when melting chocolate DO NOT add milk or any liquid!
Melissa says
Mine fell apart too, but were delicious! Any suggestions on how to keep them from crumbling? I did not cook the oats first, is that correct?
Melanie says
I have similar recipe and I use pb2 it is dehydrated peanut butter it is way less calories. I just add water to make it tne same consistency as
peanut butter. it is delicious with out all the fat and calories.
Jennifer says
Pop them in the fridge and good for a week for sure
MrsMager says
How long do you think these are good for? If you don’t eat them up in a day! LOL
Jurdene says
Mine fell apart too. But it was a delicious snack on my yogurt or just by itself.
hailey says
These were so yummy, I added a full cup of peanut butter instead of a half, they still fell apart, I drizzled honey and peanut butter over the top to hopefully make them not fall apart but they still did, I don’t know what would make them not fall apart. They were amazing either way!!
Joanna says
These were great! After reading the comments I decided to add 2 ripe bananas to the mixture to help give them some moisture, and I also used almonds and almond butter in place of peanuts, they are so yum!
Melanie says
I did 3 1/2 cups oats, 1c chuncky peanut butter, 1/4c honey, 1/2 cup applesauce, 1/2c vanilla yogurt, 1/2 cup coconut flakes, 1/4c dried cranberries, 1/4 honey roasted sunflowers, 2tbs chia seed, 2 tbs flax seed, 3tbs coconut oil. Mixed well with hands. Really dug in.
Then I got a large cookie sheet and two sheet of parchment the size of the pan. One on bottom, spread mixture roughly out with spoon, second piece of parchment on top and used a roller (actually I used the peanut butter jar) to pack the mixture out flat.
I left the second piece of parchment on top and put it in the fridge.
Jennifer says
I used Molasses, chocolate and a tad more peanut butter and they were addicting. Most do not like molasses but that was all I had to sweeten it with. Will be trying another mixer in the next few days.
Sarah says
I just made this after finding it on pinterest. I read the reviews and decided to add 2 egg whites. for my add ins i added a few chocolate chips, dried cranberries, sunflowers seeds and some flax. I also baked them for only 20 minutes. The turned out really well! They are soft and a little like oatmeal cookie bars!
Meggie says
Added 2 egg whites to these… Had I greased the pan they would have turned out great! Soft & chewy!
jaiamara says
Shana D, try Sunbutter, which is made from Sunflower SEEDS instead on almond or peanut butter. Sunbutter is delicious!
Gina B says
I just finished my second batch. I use sunflower butter and my family loves them. I also use chocolate chips to help with binding.
Jennifer says
I would try almond butter – in fact, I need to make a variation soon!!!
Jennifer says
Shana – almond butter would work just as well I am sure. In fact, I almost used almond butter but my husband prefers PB and I was making it for him so PB it is. Also, some people do not enjoy bananas so they could use more ice cubes and/or protein powder for thickness.
Shana D says
I.want.these! I love peanut butter and I love granola bars but unfortunately my husband and daughter are allergic to all nuts. Is there another “butter” type that you think would go well with this?
Sarah says
I made these with:
4c oats
1c PB
1/2c Honey
4 TBSP Flaxseed (Looking for the extra protein since I’m pregnant!)
1/2 cup cinnamon applesauce
I randomly decided to throw the applesauce in to make it not so dry.
I taste tested before I put them in and they were really yummy! Cooking now. Hoping they taste great even after baking. I really need a healthy snack. 😉
Thank you!!!
TD says
Fantastic bars. I made them last night following the recipe as written, adding in cranraisins, orange dried cranberries, choco chips. Turned out just like the picture. The only changes I made after reading all the comments were. 1) put into oven for about 5-6 minutes, then removed pan, using a folded a piece of parchment paper, pressed mixture tightly into pan again 2) returned pan to oven and continued cooking for another 15 minutes. 3) removed pan from oven and after setting for 5 minutes, scored into bars with a serrated knife. 4) waited until completely cooled and cut again along the scored bars from step 3. Came out great, just a few crumbs along the edges, to eat. Enjoy! I did
Jeannie says
Wonderful!! Did it just like the recipe above stated, minus the chia, and added a handful of choc. chips. (put about a cup of shredded coconut to the last third of the pan) Baked for about 8 minutes, till the edges were golden, then took out and let cool for about an hour before cutting. They were just a bit crumbly, but they were mostly holding together so let sit in the cold for about another hour, then were able to remove from pan without much crumbs. 🙂 The kids LOVE them!! They are soft and so much better than from a box! 🙂
Cici says
Mine totally fell apart but they were tasty!
Kristen says
I made these using the Bobs Red Mill Mueseli. It already has raisins, dates, walnuts,almonds and sunflower seeds in it. Also used a full cup of peanut butter and a little bit more honey. I added flax seed, cocunut, and chocolate chips. They turned out really awesome.
Faith says
Can’t say I followed it to the T, but would like to thank you for the idea. Changes: Used 2 tblspn flax seed instead of chia. Omitted the peanuts. Doubled the peanut butter. Added 3/4 cup honey. For the add in’s : About 1/4 c unsweetened shredded coconut, small amount of raisins, cranberries, prunes, and dates.
I think that your use of cherries would be a great idea because I felt like it was missing a “tart” flavor. I would also add a pinch of salt. Sounds silly but I think it brings out the taste. I put parchment paper inside of the pan. I baked it for about 7 mins. I immediately placed it into a plastic container so that it would stay moist and together. Tiny bit of crumbling, not much.
Thanks so much!
Kimmi says
These were great! I did find that the batter was a bit crumbly, so I added two tablespoons of flaxseed and 6 tablespoons of water. That really made the batter nice and ‘doughy’. Thanks for sharing the recipe!
Jennifer says
Be sure to mix it well but otherwise, I think it would work fine.
Becky says
Can I use almond butter instead?
Deanna says
I haven’t made these yet, but based on the feedback, I’m wondering if adding a bit of oil to the recipe might help to make them a little softer. I like to use coconut oil for baking. I’m gonna give them a try using the no bake method.
kate says
So, made these last night. Decreased oats to 3 cups, added 1/4 cup chopped chocolate chips and 1/4 cup chopped pecans. Mixed in the honey first, then the peanut butter. Added a little more honey at the end. Pressed into a greased 13×9 and put in the fridge, we all love them 🙂
Lizz says
I used 2 C oats, one mashed overripe banana, one egg white, about 1/2 C peanut butter, about 1/3 C toasted coconut, and about 1/4 C honey. Baked for closer to 30 minutes. They’re great!
Krista says
I just made these delicious granola bars. I added 1 c. crunchy natural PB, and about 1/3 c. apple butter. For fillers I used craisins, milk chocolate chips, almonds, and pecans. It tastes fantastic, and the texture is perfect! I have chia seeds being shipped to me soon, so I’ll be interested to taste these with the chia added.
Gina B says
This was my first attempt but it turned out pretty well! I substituted the peanut butter for sun butter because my daughter’s school has a strict nut-free policy. I added chocolate chips to help with binding and cut it immediately but let the bars cool overnight in the pan. My family loved them! Thank you for the inspiration!
EH says
I used good quality almond butter and oats from Trader Joe’s to make these and they are great! Used a little more almond butter and honey and cooked at 325 for 25 minutes.
Leah @ Whitefoot Blog says
Love this recipe! I’ve made it twice already and added sunflower seeds to this batch. When I make them, they have a hard time keeping their shape after I cut them (they don’t look like that picture of stacked bars above, but more like a pile of loose granola). I used 1C peanut butter, and I think I’ll need to add even more next time. Thanks for sharing!
Dives says
I’m going to try this but instead of adding anything besides choc chips (mandatory) and banana instead of brown rice syrup or honey, I’m going to try folding in 2 whipped egg whites w the PButter then oven baking for 2 hours on 200 degrees as I would for merangues. I’ll post my findings! My ultra, calorie conscious daughter does not like added sugar of any kind!!!
Jennifer B says
these are in he oven now! I increased both the peanut butter & honey. I used chunky natural PB & decreased the choppd peanuts. I’m trying these in muffin tins & hoping they won’t crumble!!
Caity says
Tried these this evening. Added chopped up marshmallows & chocolate chips. Sitting on the counter cooling, but seem pretty well stuck together. Think the marshmallow definitely helped hold them together.
Jennifer says
The peanut butter adds a good amount of protein but feel free to try to alter the recipe to your needs. Good Luck!
jennifer says
im wondering if i could add protein to these to make them protein bars for my husband?
Susan says
If you’re looking to use the baking method, the recipe must have a binder. Honey is a sweetener, and while it is sticky, it will dry out in the oven during baking. Try using something thick for a binder like apple sauce, or a jam or marmalade or something. Basically, it should “fill in the gaps” between the other ingredients while moistening the oats a little during baking.
melanie says
My favorite granola bar has always been the Honey and Oats bar so could you by any chance help me figure out besides the honey and oats what else would I put in them and how would I make them. Thank you.
Dayna says
I just made these and they are delicious! I followed the recipe exactly but I used the refrigerator method vs. baking. No crumbliness here, and my family loves them!
Lauren @ The Tornadic Kitchen says
Wow these sound delicious. I’ve got to make a batch of these for the busy workweek!
Lacey says
Great post! I was wondering if you had an estimation on how long they will keep for…? 🙂
Thanks!
Elaine says
I made these and liked them a lot. I did use a bit more peanut butter and honey than it called for because several people mentioned how they didn’t stick together. I also didn’t press mine as thin as the recipe said. It made them a bit crunchy on the outside and chewy on the inside, which I liked. Depending on how thick you make them, the bake time will vary, so keep an eye on them when you bake them. My next time I’m going to make them with almond butter and almonds.
Loren says
I make similar ones with about 1/4 cup honey and add vanilla greek yogurt and 1/2 cup of applesauce if it’s too dry when mixing. If I cut them while they are warm with a pizza cutter they stay together for the most part. I thought about maybe using an egg white or two but haven’t tried it yet.. 25-30 mn in the oven works for me.
sue in CA says
It did turn out like granola, BUT I forgot to set the timer and was making dinner … yup, it burned on the bottom and around the edges. Picking out the badly burned stuff, will see if hubby wants to nosh and pick thru it. May have to add it to my compost pile.
I’ll make it again another time and be sure to set the timer … we learn from our mistakes!
sue in CA says
If this turns into granola that will be perfect … hubby likes to snack on healthy granola at night more so than granola bars. Will be making this recipe tonite or tomorrow. I’ll let you know how it turns out.
Christi Wruck says
I read the comments so was wary of the dryness. I mashed a banana and mixed it in. I also warmed the sweetener with the honey. They’re fantastic. Perfect actually. Next time, I might toast the oats and see how the texture and flavor change.
Megan says
I guess I should have read the comments before making these. They are so dry. Should’ve used more peanut butter or honey.
Jennifer says
Let me know Sarah!
Sarah says
Only used 3 cups oats, increased honey to a little more than 1/2, and am using 11×7 pan. Am trying 325 degrees for 15 min. We will see how they turn out!
Lindsay says
After reading all the comments about the recipe being too dry, I made a few tweaks to the recipe. I used 3/4 c of honey instead of 1/2 c. I also lined the baking pan w parchment paper and greased the sides. When placing in the pan I used another sheet of parchment paper to press the mixture firmly into the pan, because without, the mixture stuck to my fingers. After the mixture was pressed firmly into the pan I drizzled more honey on top of the mixture and placed the pan in a 350 degree oven for 8 minutes. I let the mixture cool completely before cutting into bars and the bars stayed together great. I set them on a plate and there is little crumbling. My next batch I will try baking them for 10 minutes & see what happens. Hope this helps!
jennifer says
Nice and easy to put together. I made it even easier by using a cup and a quarter of chunky peanut butter rather than adding chopped peanuts. We’ll see!
Louise says
I made these but I used a full cup of peanut butter and pressed it down in the pan as hard as I could, also only cooked the for 20 mins otherwise they would have burned. After letting them cool completely in the fridge when I cut them they still fell apart. They seem to need binder like a couple of egg whites. Don’t think I will make again they were kinda dry and chaulky. Oh well
amber rowley says
I doubled the recipe and used an 11×15 jelly roll sheet. I added another 1/2 cup honey and took a little highball shot glass and rolled the dough until it was packed tight into the pan. I cooked mine for about 1/2 the time (will vary by oven, mine cooks much hotter) until it felt baked but still soft. pulled them out of the oven, let them cool for about 5 minutes, then cut with a paring knife and they’re perfect. just a little crunchy around the edges of the pan, and chewy in the middle.
Ashley @ Coffee Cake and Cardio says
Those look fantastic!!! Yummy!
Jennifer says
Hi Christina – a number of people have said that…please email Jessica (link to her site in post) and ask for tips. I am going to try and improve on her recipe as well.
Christina says
I made these and they just turned into crumbs. No way I could cut them! Good granola but not granola bars….Not sure if a couple of tbs of peanut butter or honey would fix the problem.
Becca says
Right I’ve made them, they’re delicious. I used 2 extra tbsp of both peanut butter and honey, they were fairly crumbly but they were also over done a little. Crunchy on the top and chewy in the middle!
Becca says
Mine are in the oven due to come out in a few minutes, on the crumbly -ness I wonder if adding a little extra oil to the peanut butter before melting would help, mine separated a little do there was a very dry bit in the centre. Will let you know how they turn out!
Lindsay says
I made these and they are awesome! I was nervous they wouldn’t stick together after reading all of the comments. Mine stuck together pretty well, so I thought I would offer some advice. I don’t want someone to not make these because they are worried they won’t stick together. These are so good, don’t pass up the recipe! Anyway, I added a bit more brown rice syrup than it called for to make sure they were really moist. I put them in the 9×13 and pressed down on them w/wax paper (to make sure they were really set). Then I read some where else not to cut them until they are really cool (a couple hours). Then when you do cut, use a butcher knife so that you can cut them in one motion. Don’t use a small knife where you have to “saw”. Anyway maybe that will help others! Thanks for the recipe!!
michelle says
These are awesome. I used peanut butter instead of butter and 2 cups quick oats and 2 cups rice puff cereal and a capful of wheatgerm. I also thru in some coconut, they turned out great with a wonderful flavor. Thanks for this recipe, my kids and I eat these from the store all the time. This will save me some money & I know exactly whats in them. Thanks again
kirsten says
So making these in a few minutes for my little man. He loves the peanutbutter chocolate ones from the store and I dont like whats in them. I will have to get some brown rice syrup for the next time I make these. I will post a link to your blog from mine so people know where to get these!
Christel says
I will never buy granola bars again! These are perfect, crunchy or chewy! Great snack and makes a great cereal too!
Dawn M says
I made these this weekend, First batch.. I didn’t use enough PB or raw honey or I had a brain melt down and I burned them : So I learned my oven doesn’t need 25 min 🙂
Next batch .. worked out great for granola, not bars.. but oh well! I added in dried cherries and almonds and cacao nibs All Vegan and Gluten Free 🙂
Jennifer says
Hi jessica – no, you are not missing anything. She guest posted here but you can email her to get her suggestions on how to make the recipe better or even let her know that it is not working. Good Luck! p.s. I am going to work on the recipe and modify it until it works.
Jennifer says
Hi Tina,so glad you enjoy the flavors. A few people have told me that they are not holding as bars so I have suggested that they reach out to Jessica, who created the recipe.
Tina says
I made these today and they crumbled into the tastiest granola! Bar fail but total win as a granola recipe! 🙂 thanks!
kari says
This sounds delicious with all the yummy ingredients I would just keep it in a baggie or jar for snacking or to sprinkle on yogurt or ice cream if they crumble. Why throw these yummy crumbs away? No waste here!! My college son is gonna love this!!
Jennifer says
Is the almond butter the same type of consistency as PB?
Jennifer says
Hi Jessica – the post was a guest post on my blog so the recipe is not on her however, her contact info, is so you can email her.
Jenne says
Wow, looks good can’t wait to try them. But I’m going to substitute chopped almonds and almond butter in place of the peanuts/butter. Think it’ll work?
Karyn says
Mine would not stick together as I cut them into bars, either. But no one is complaining about the pbutter granola!!! 🙂
Jessica says
Hello, I went over to her site but couldn’t find these. The closest I found was some pretzel bars. http://www.howsweeteats.com/2011/09/peanut-butter-pretzel-granola-bars/
Am I missing them?
Jennifer says
Oh Melody – so sorry to hear this. Write Jessica at How Sweet It Is and see if she has any tips.
melody says
Recipe fail. Right into the trash. The “dough” wouldn’t stick together at all.
Lorraine says
Would you have an approximate on the calories per portion?
Jennifer says
I have not but head over to ‘How Sweet It Is’ and ask her if she has tried it.
Jennifer says
Hi Marissa – congrats on the pregnancy. The agave may be a bit thin so maybe a bit extra PB?
Jennifer says
Hi Jamie – head on over to ‘How Sweet It Is’ and ask her for tips. thanks
Jennifer says
I have heard from a few people that they were crumbly. Feel free to contact Jessica at her blog and let her know – she may have a suggestion. Thx!
shana says
i made these; while they were very crumbly, you can eat the crumbled parts as granola! so, not a total waste. i’m going to try again with more pb or rice syrup.
Marissa says
Thanks so much for the great recipe! I’m thinking of trying this out today since I have everything on-hand, but I have a question first: my husband and I are in the process of trying to go sugar-free since we both have a bit of weight to lose and I’m 4 months pregnant, so I’m wondering if I could substitute agave nectar for the brown rice syrup/honey. Would that work in terms of flavor, or would it make it overly sweet? Thanks again, great recipe and I can’t wait to try it out!
Jennifer says
HI hon – this is not my recipe, it was a guest post so feel free to go to the How Sweet It Is website.
Jill says
Do these come out chewy or crunchy? Also, any word on the crumbling issue? I’m on a VERY limited budget (new teacher with out of state college debt!) and don’t want to waste the money on ingredients if they just crumble! thanx!
Lenda Humphrey says
This is great! I saw a new display of gluten free bars at the grocery and on the front it said gluten free… and in the ingredients said wheat.. READ LABELS because it is an uneducated world out there lol. Anyway.. I am making these.. with marshmallows.. MMM!! <3
Ashly says
Have you ever made these with agave nectar?
angela says
Mine fell apart as well. I still love the taste though. I am just eating with a spoon instead! Do I just need to add more peanut butter you think? I did add in the following: 1/4 c wheat germ, 1/4 c milled flax seed, 1/2 c crasins and 1/2c apricots. I put a whole 16 oz. jar of reduced fat natural peanut butter and added more honey as well. I would love for them to be a bar so it is easier to eat. I would love any insight on this! Thanks!
Jenny says
I just saw this on pinterest and just had to click through to see your pyrex. 🙂
Whitney M says
So simple but very delicious AND healthy! Great recipe 🙂
Jamie Griffith says
Recipe was a bomb! I used more PB and Honey than called for and they still fell apart. Disappointing, I have been looking for a good recipe for granola bars! Oh well, at least I have PB granola.
Eva B says
The same thing happened with mine, Amber. It tastes delicious, but I’m pretty disappointed that they just crumble. I put them in the fridge, so hopefully they will set more, but I don’t think they will. Disappointing especially because that was a lot of peanut butter to waste 🙁
Jennifer says
Hi Amber, I will send the question to Jessica
Amber Smith says
How do you get them to stay together?? I just made this and when I cut them and tried to take out of pan, it all crumbled…
Tara says
Saw this on Pininterest, they look delicious, how long do these last as I’d love to make these for lunches – if wrapped in plastic wrap after they are cooked do they need to stay refrigerated or can they sit out?
Katie says
I’m going to make these for my boyfriend, but really, they’re for me. 🙂
Robyn says
I just made these and oh my goodness, they are amazing! They’re in my fridge right now to set, but I just had to lick the bowl and spatula…and the measuring cup I used to melt the peanut butter…
I added way more chia seeds than I probably should have, and substituted peanuts for almonds since I didn’t have any and although I adore peanut butter, I’m not really a fan of actual peanuts.
Diane {createdbydiane.blogspot.com} says
They sound delicious, I love peanut butter!
Shaina says
Love ’em!
Jeanette says
I’ve been using chia seeds a lot lately, so I’ll have to try them in granola bars now!
Marla says
Love Jessica & her blog! Great feature. Can I join u for messy kitchens & walks??!!
Cookin' Canuck says
Oh my, these really sounds fantastic. Great combination of healthy and yum!
Jason's BBQ Adventures says
Looks absolutely delicious! Love the bacon, as it makes everything better. 🙂
Maria says
I will be making these!
Cajun Chef Ryan says
Bacon? Did you say bacon? Oh okay, well the granola does look great, and flax would be a good addition too!
Jennifer says
Hi Kim – love discovering new people and blogs so I am off to yours. Thank You for coming by
5 Star Foodie says
These look scrumptious, great that they are so quick to put together!
Emily says
These sound delicious! Looking forward to making them myself!
Jessica @ How Sweet says
Thank you so much for the feature!
Kim ~ Quit Eating Out {Recipes to Make Dining Out A Choice, Not A Chore} says
These look so great. What a good snack for my kiddos and I. I’m bookmarking to make this weekend! So glad to jump to your blog from Twitter…. Love it and will be a regular reader. Have a super weekend!!!